Wunderbuild Job Schedule 2.0 User Guide
Importing
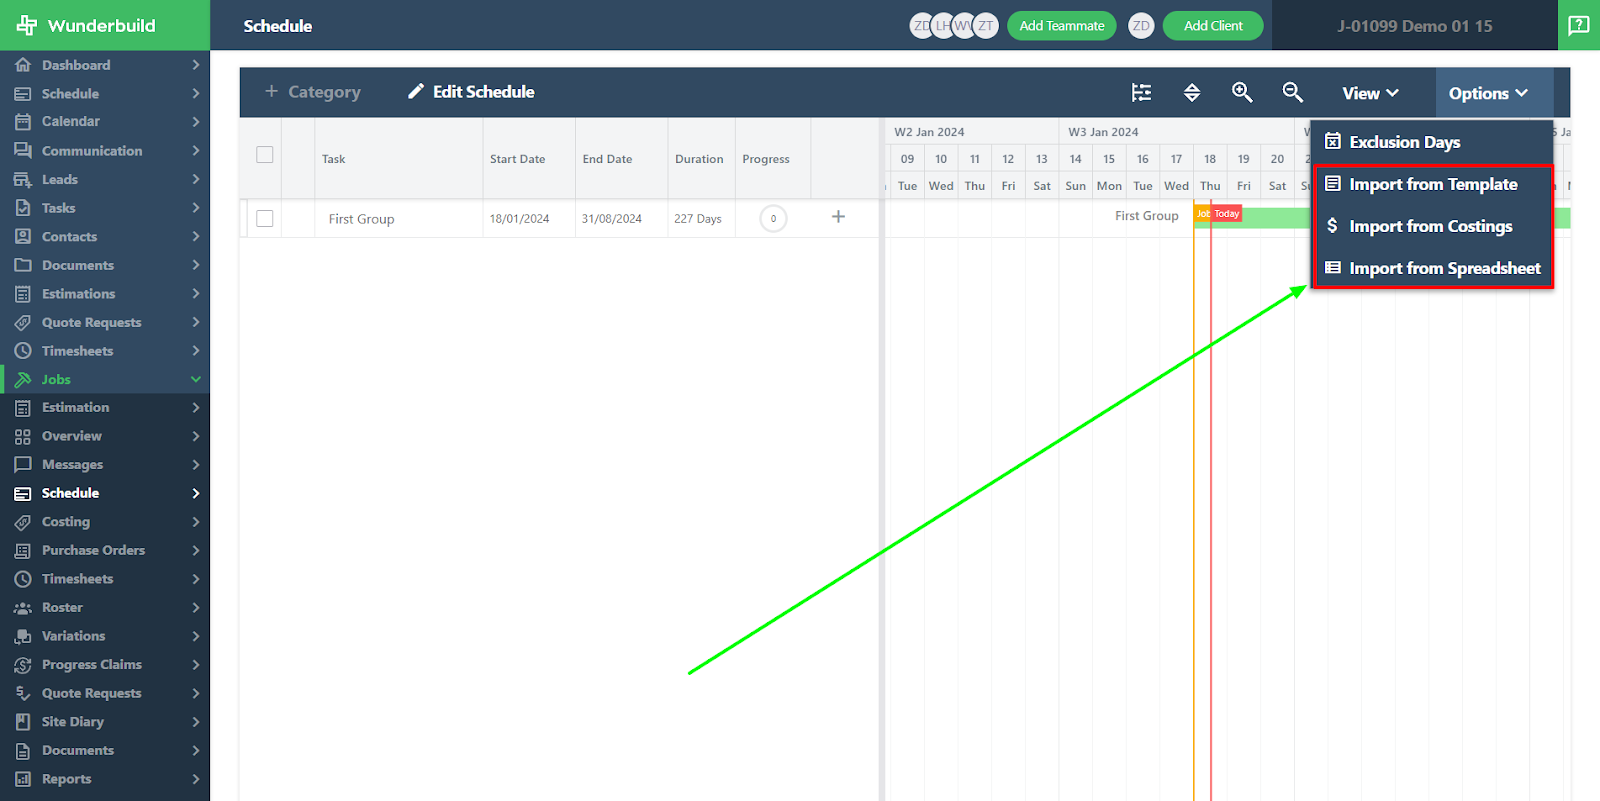
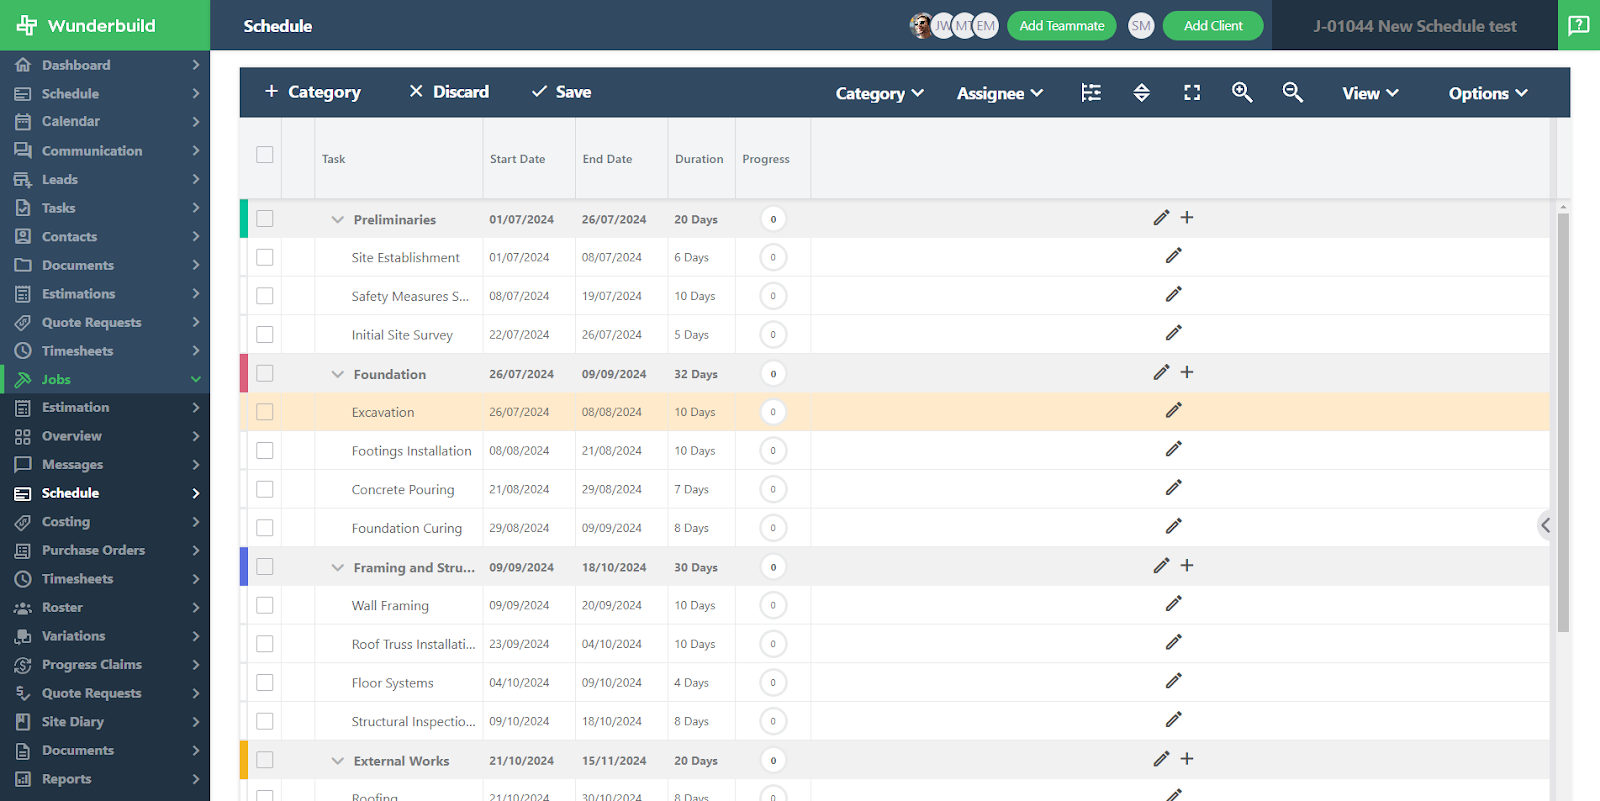
1. Click ‘options’ on your schedule to import your schedule into Wunderbuild. Below are instructions on the different types of importing.
Import from template:
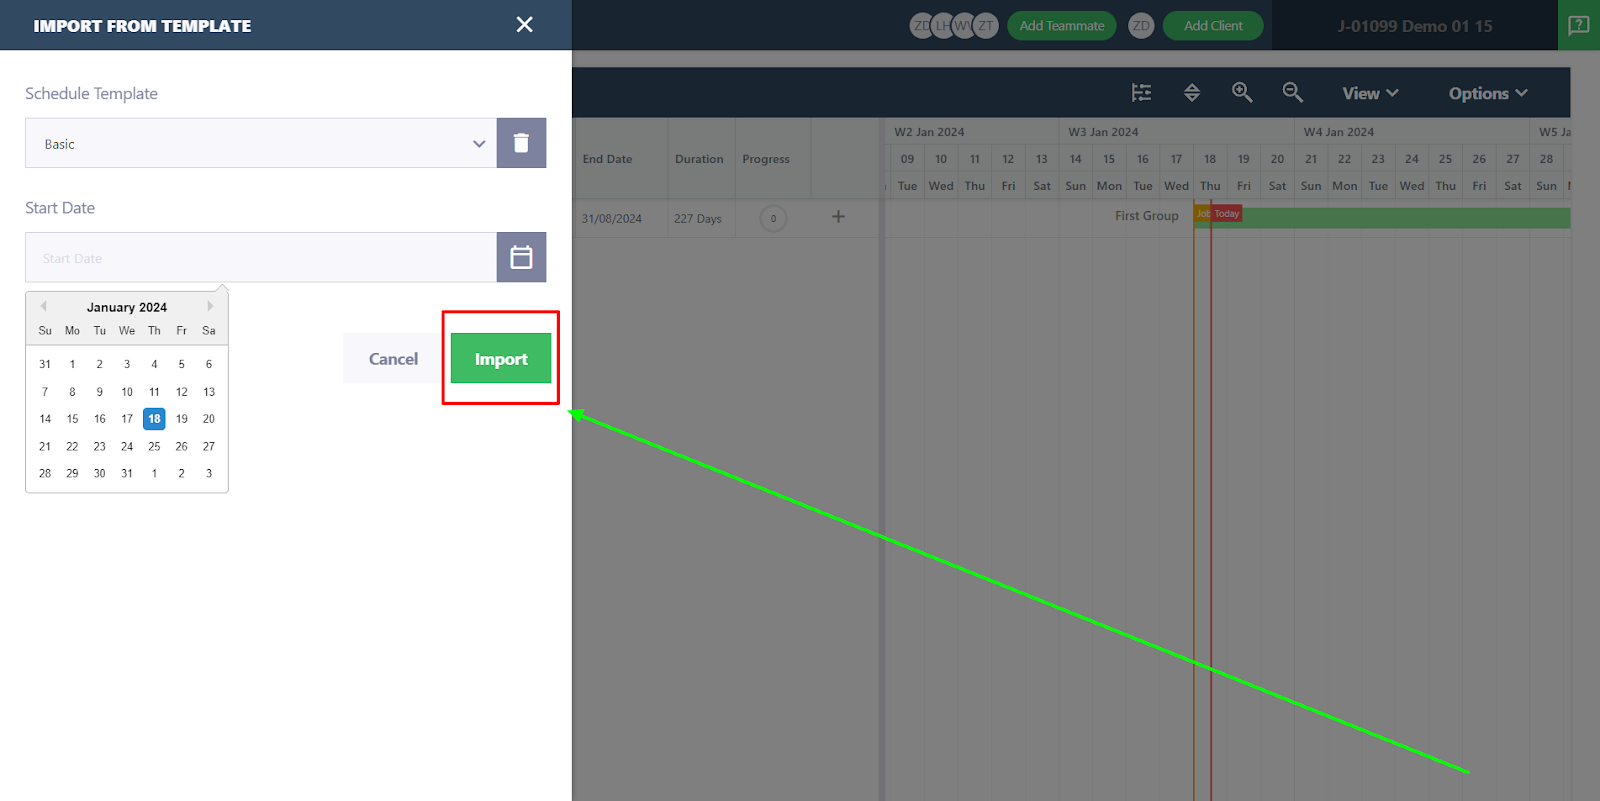
2. If you have saved a schedule template before you may import your previous schedule and the system will let you pick a start date. Please take note that this will import everything including dependencies.
Importing your costings:
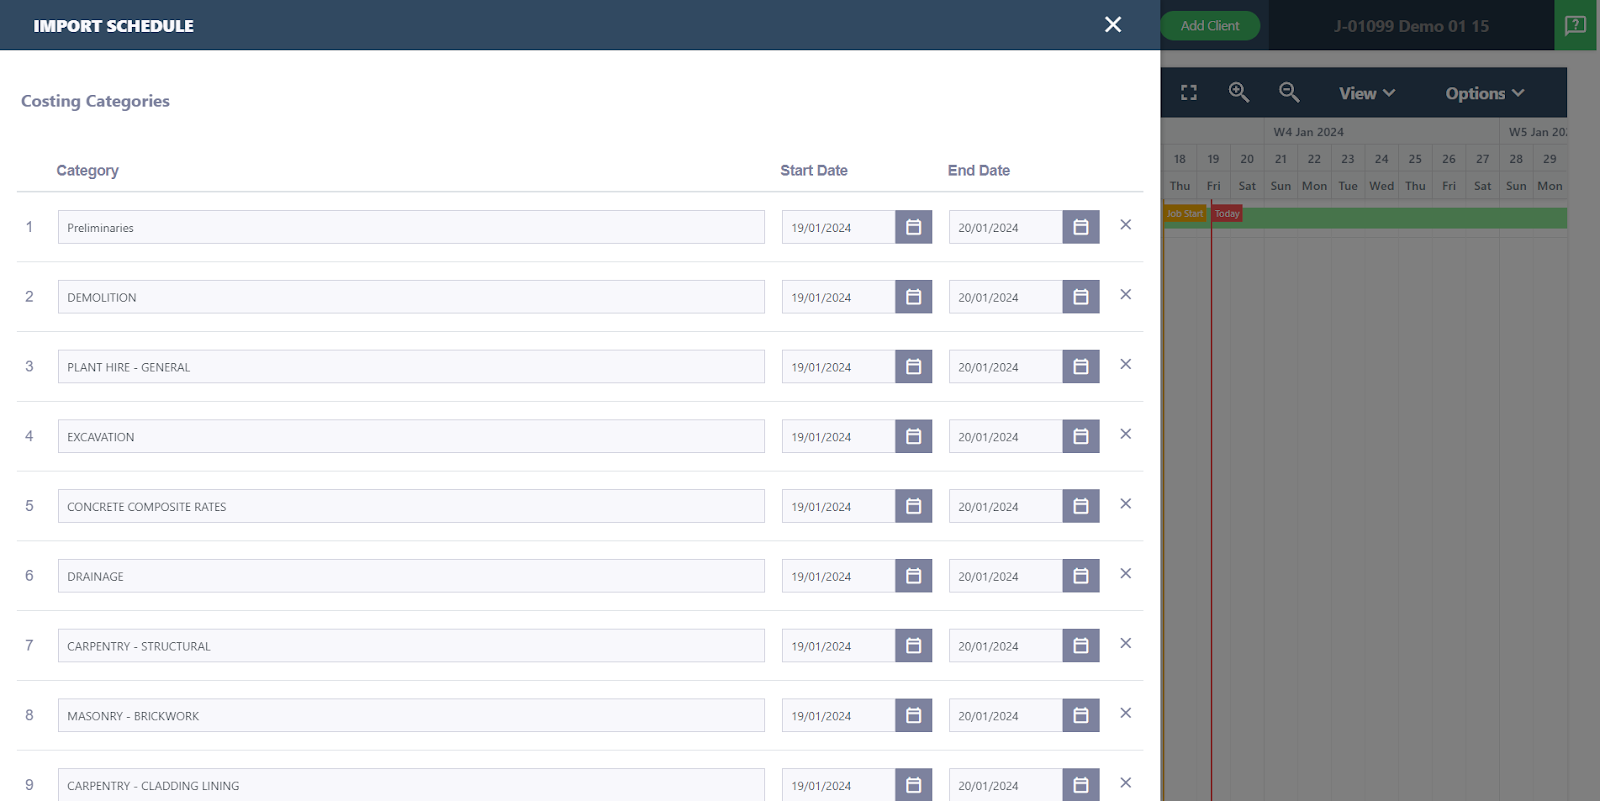
3. Instead of building your schedule from scratch you may use your estimation costing as a baseline. Remove categories and items that are not relevant to your schedule otherwise you may add a start and end date to them or edit them after importing:
Import from spreadsheet
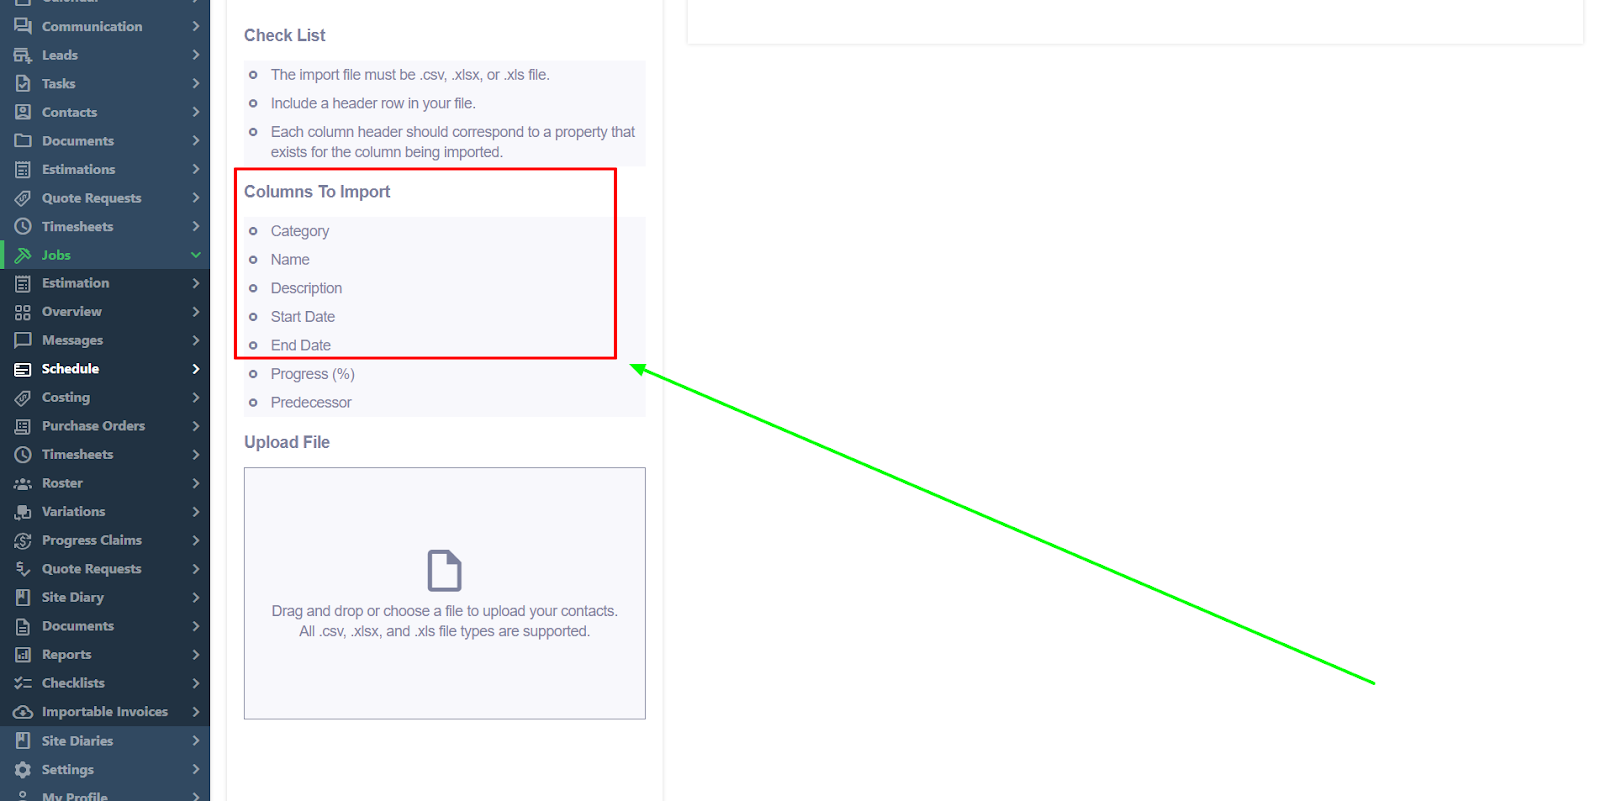
4. You may import from a spreadsheet by creating header columns that contain the following information. The main four columns that are required are: Category Name, Name of the Task, Start date, and End date.
Build Manually
Create categories, items and set duration
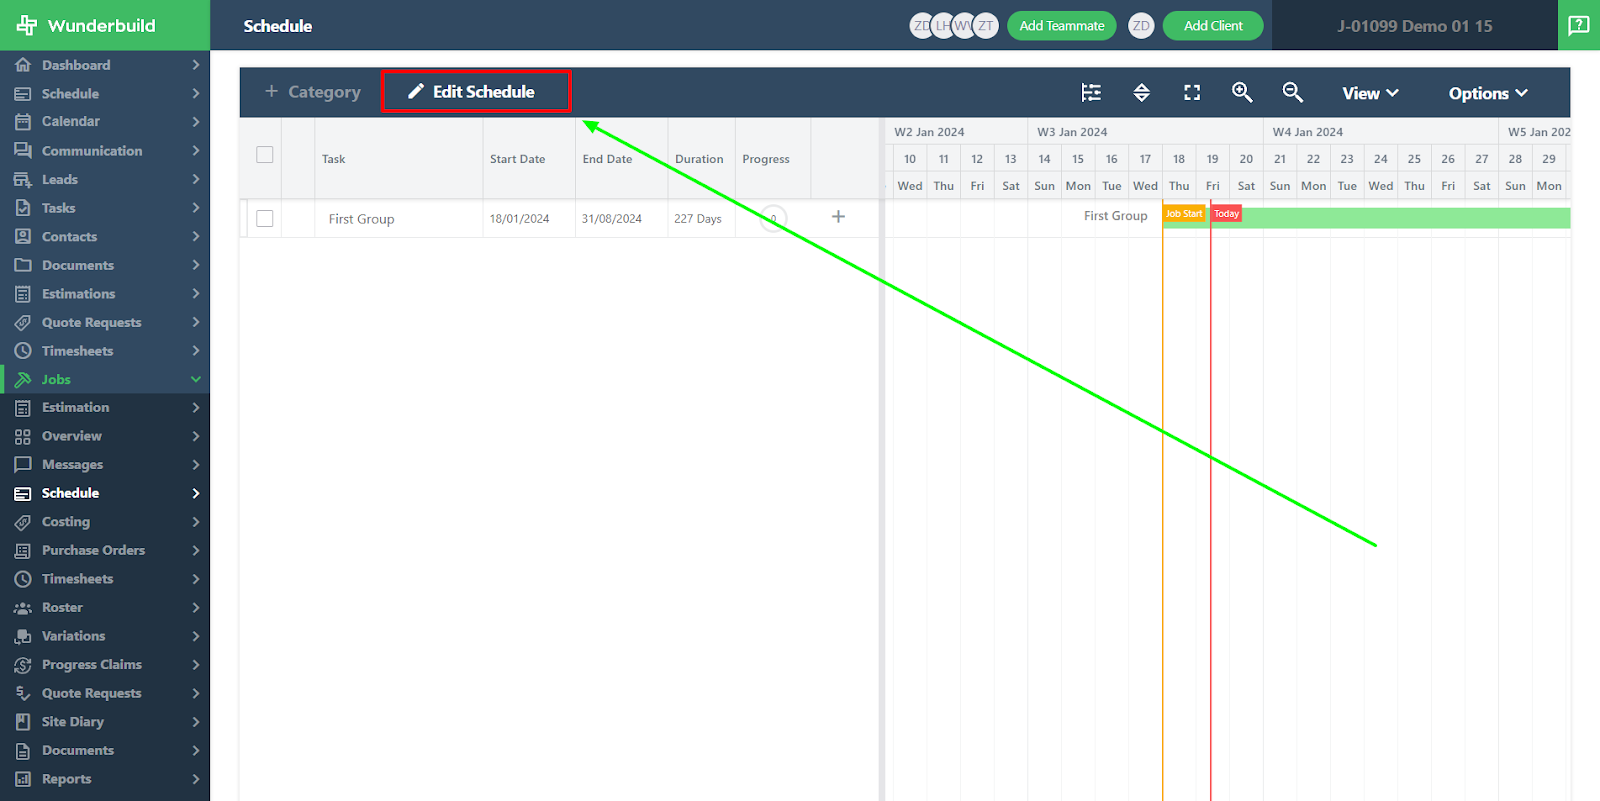
1. To build out your schedule you will need to be in edit mode. Click the edit button on the top right of your schedule.
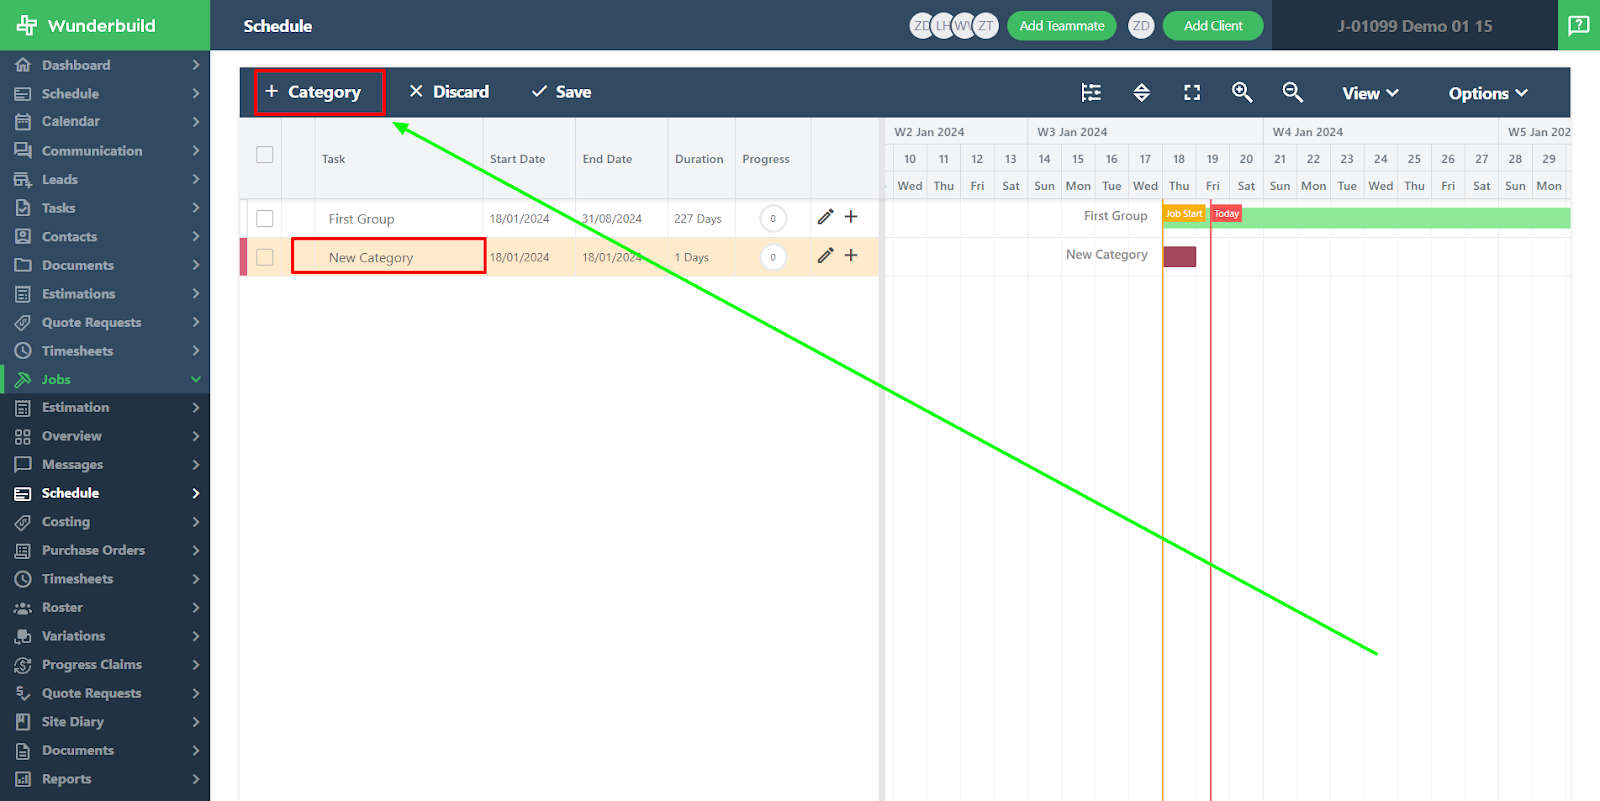
2. Now that you are in edit mode, build your categories by selecting the category button. As soon as you click the ‘Category’ button a category will automatically appear.
3. Click into the category text where it says ‘New Category’ and replace it with your category name.
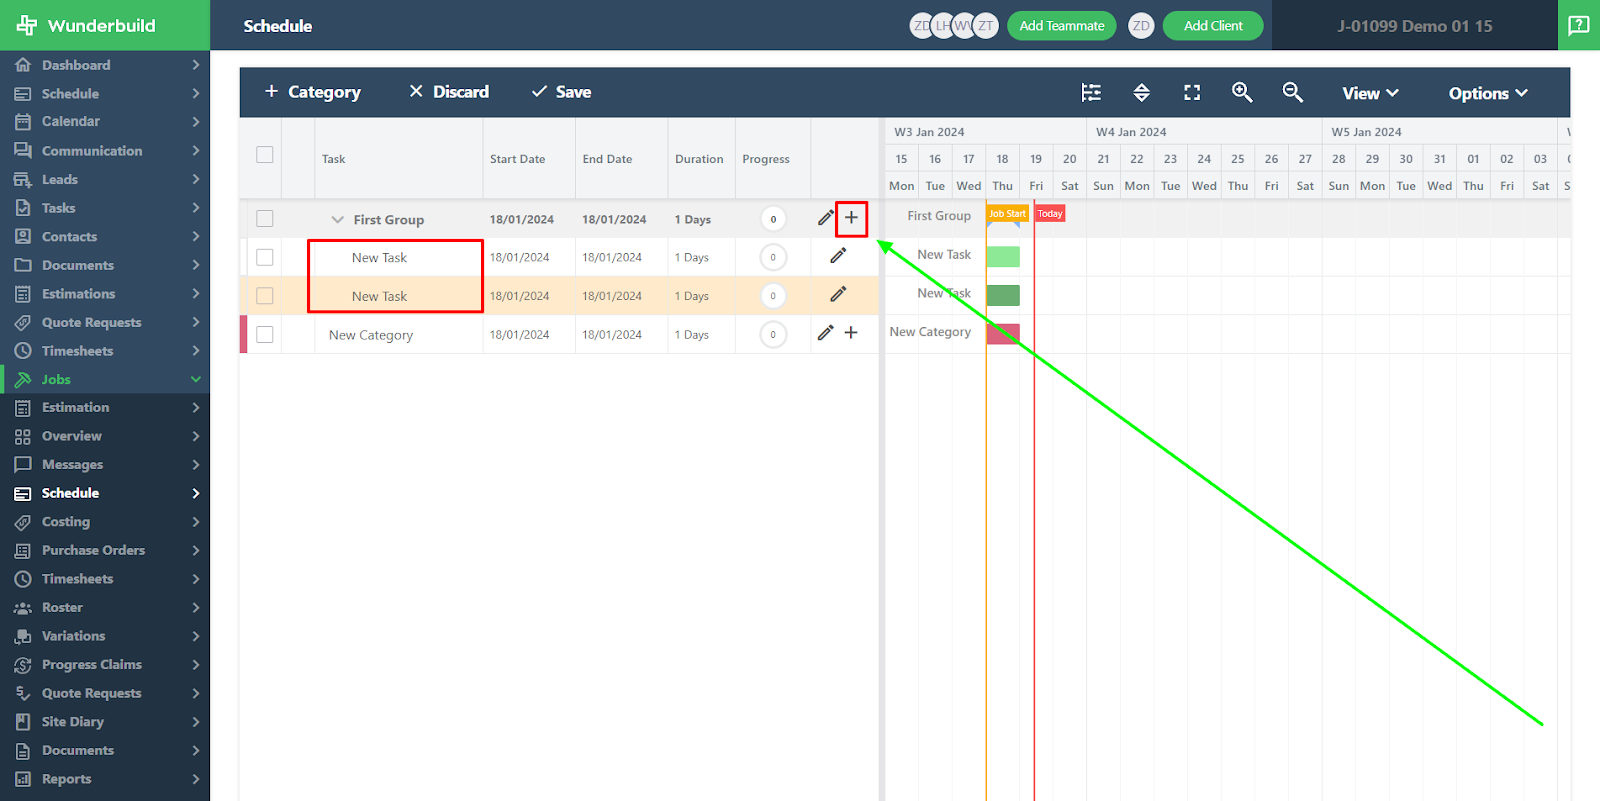
4. For each category there is a plus button, click it and it will automatically create items within your category.
5. For each item you create you can now name the item appropriately.
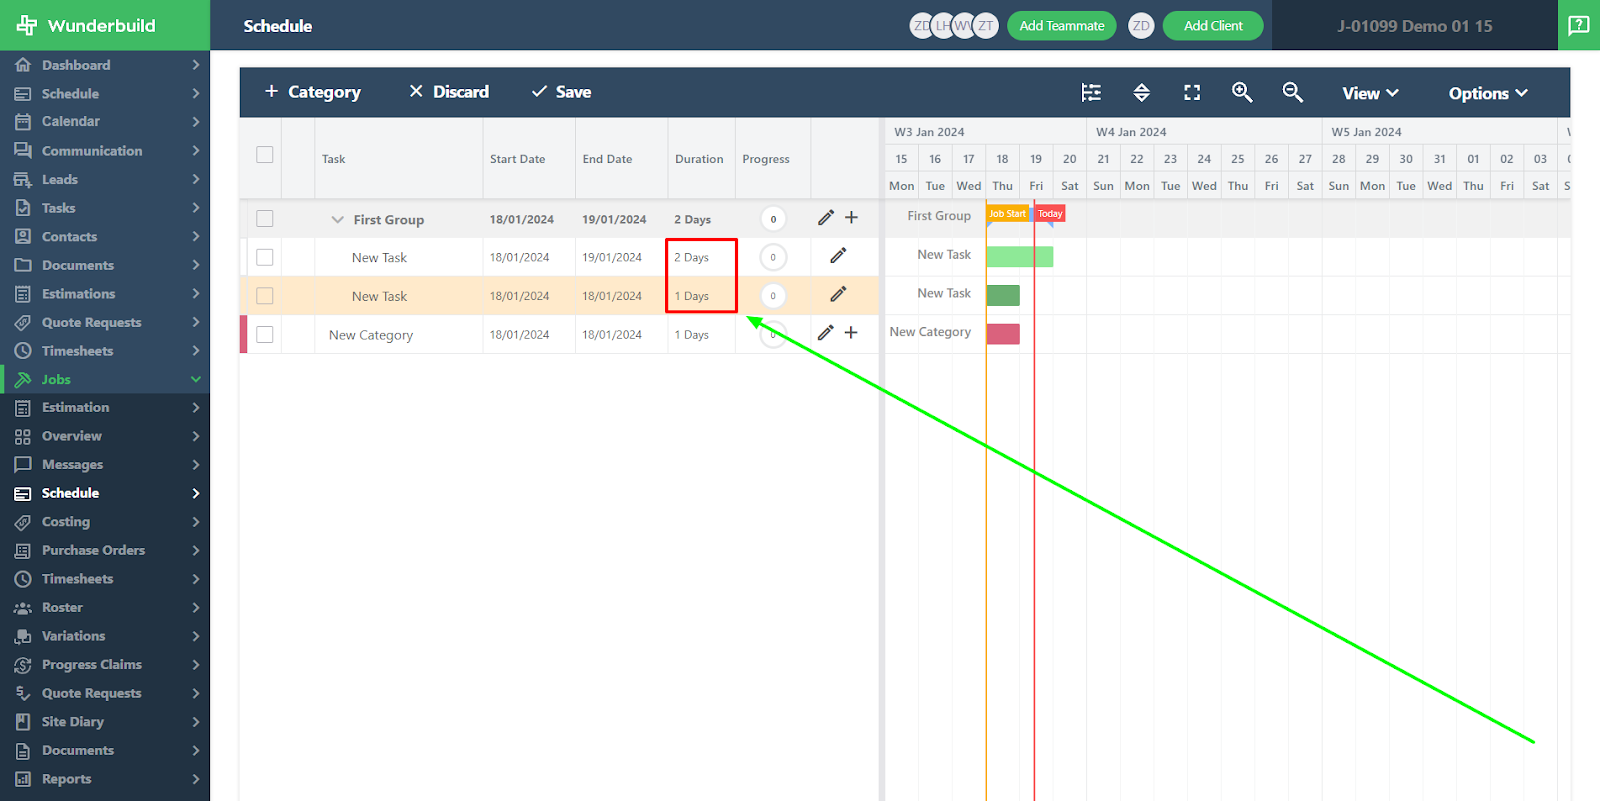
6. Set the durations for your scheduled items by simply entering the number of days into the duration field.
Link tasks with dependencies
7. There are three ways to create dependencies in the schedule. Using your keyboard and using your mouse.
Using your keyboard
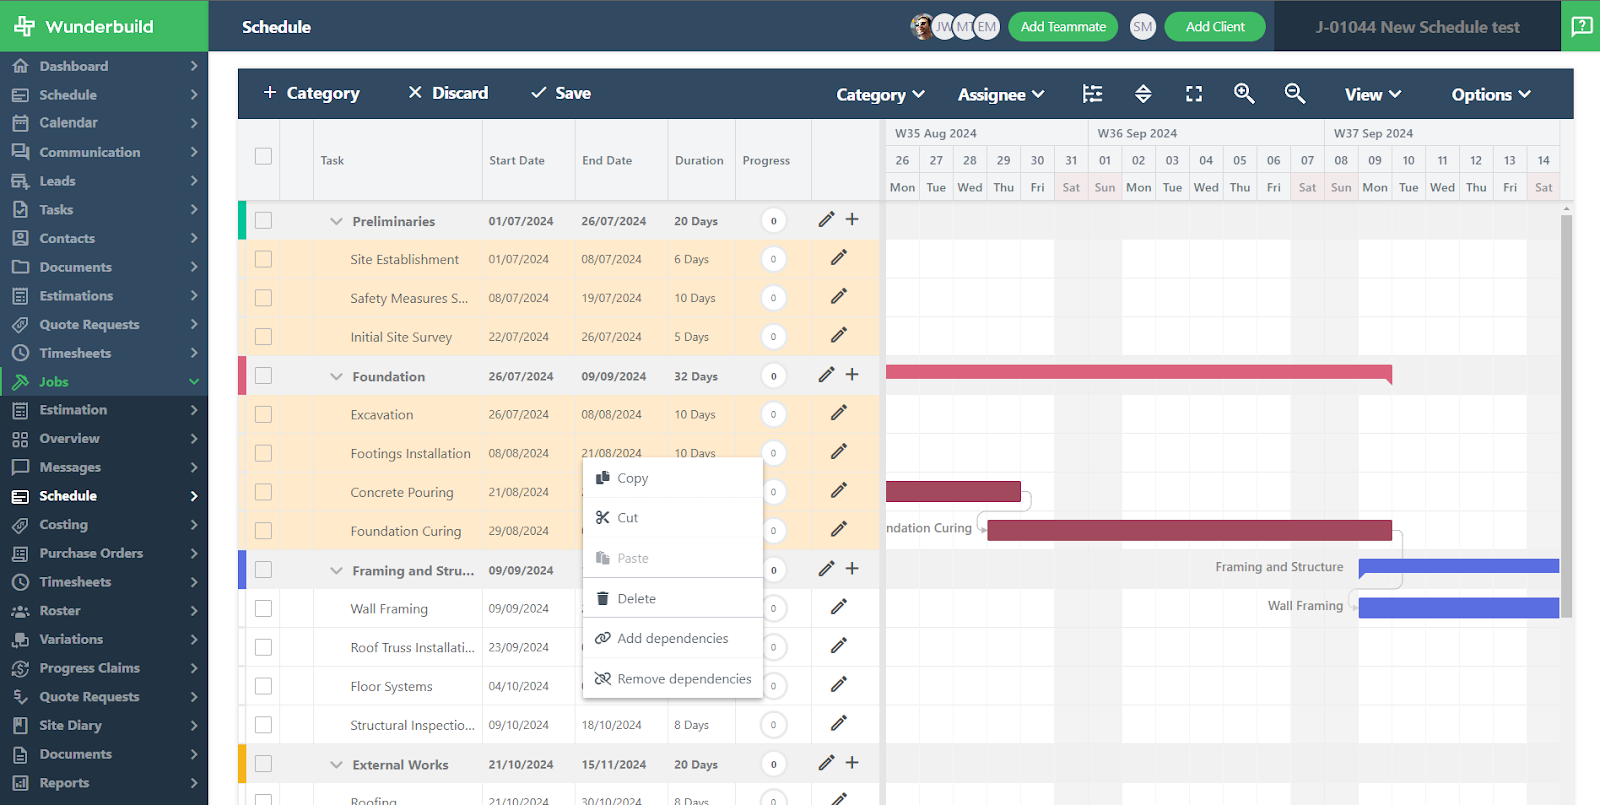
8. The quickest way to set a dependency is to hold the control button on your keyboard and then click the items you want to be dependent on each other. This will highlight those items.
9. Now they are selected, right click anywhere on the highlighted items and choose “add dependencies” and those tasks will be linked.
10. To remove a dependency double click the line of that dependency and select the ‘delete’ option.
Using your mouse
11. By using your mouse you can click on the schedule from one side of the task and drag a link to another task. This will create a dependency between those tasks.
Edit Button
12. By clicking the edit button to the right of a task you can set a predecessor, you can also choose the dependency type and set a lag time which will be briefly explained in the section below on 'Choosing dependency type'.

Choosing dependency type
13. In Wunderbuild you can set the dependency type by double clicking the dependency line coming from a task and choosing the dependency type.
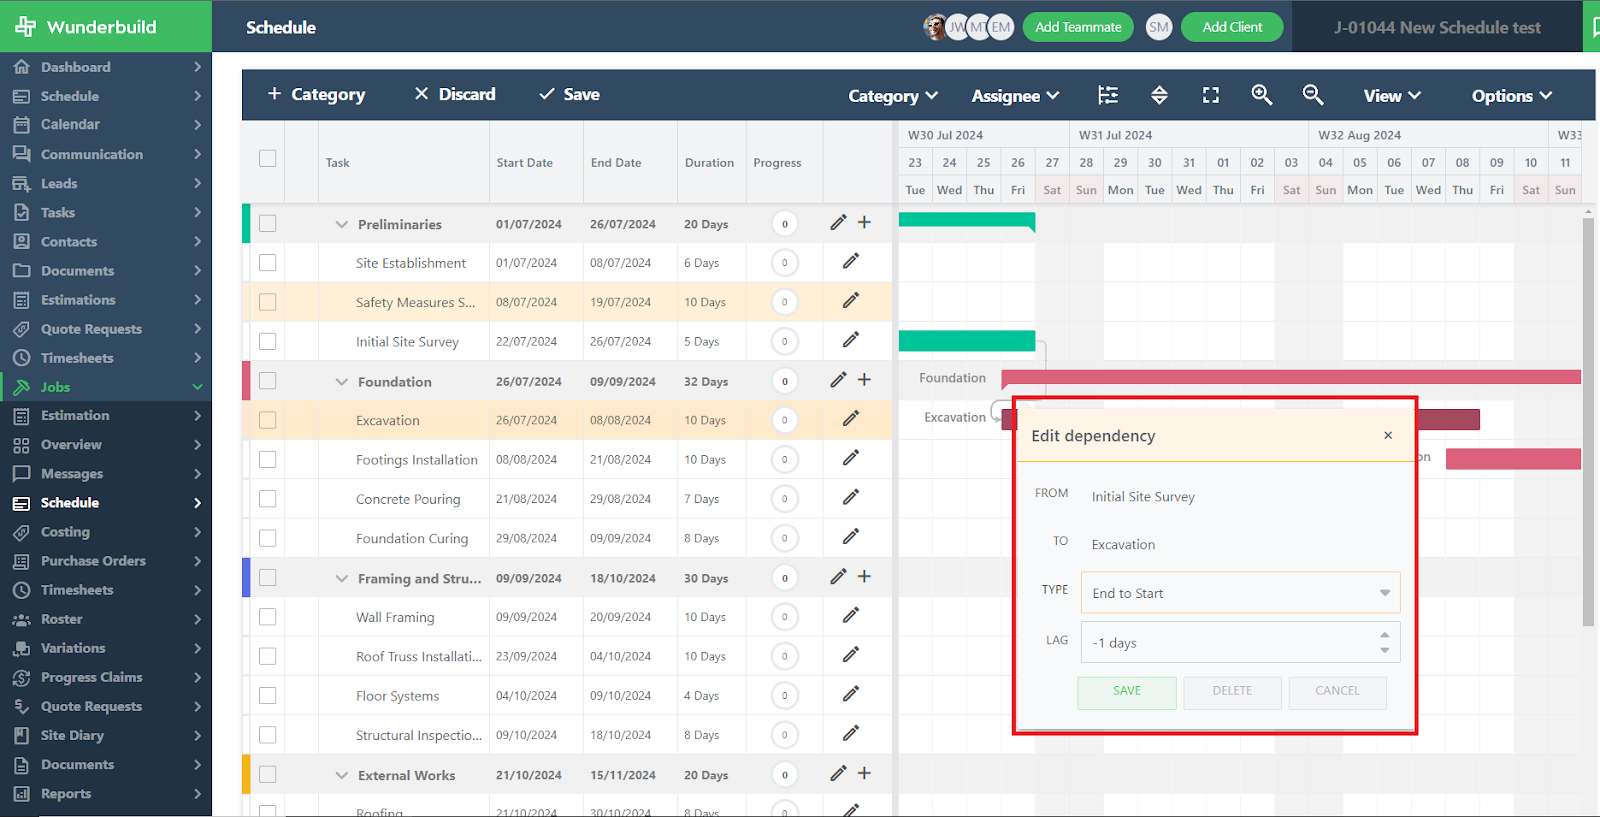
14. The other way is to click the edit button for a task like previously done for linking a task and choosing your dependency type from the dropdown button.
15. You will have four dependency types to choose from:
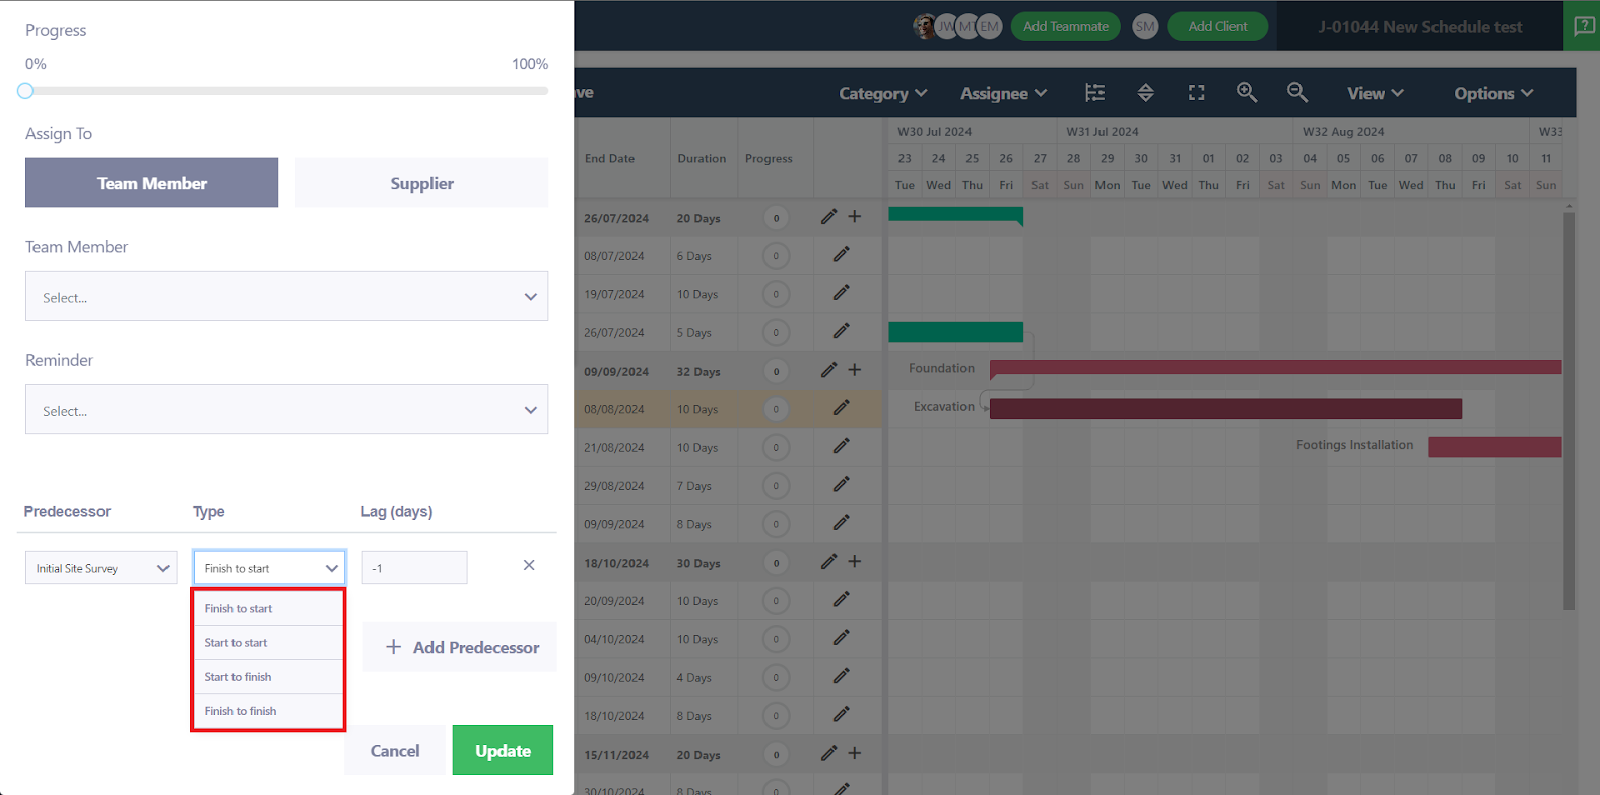
Start to Start (SS)
The predecessor task begins before the successor task can begin.

Start to End (SE)
The predecessor task begins before the successor task can end.

End to Start (ES)
The predecessor task ends before the successor task can begin.

End to End (EE)
The predecessor task ends before the successor task can end.

17. You can also add lag time by clicking the edit button to the right of a task as well.
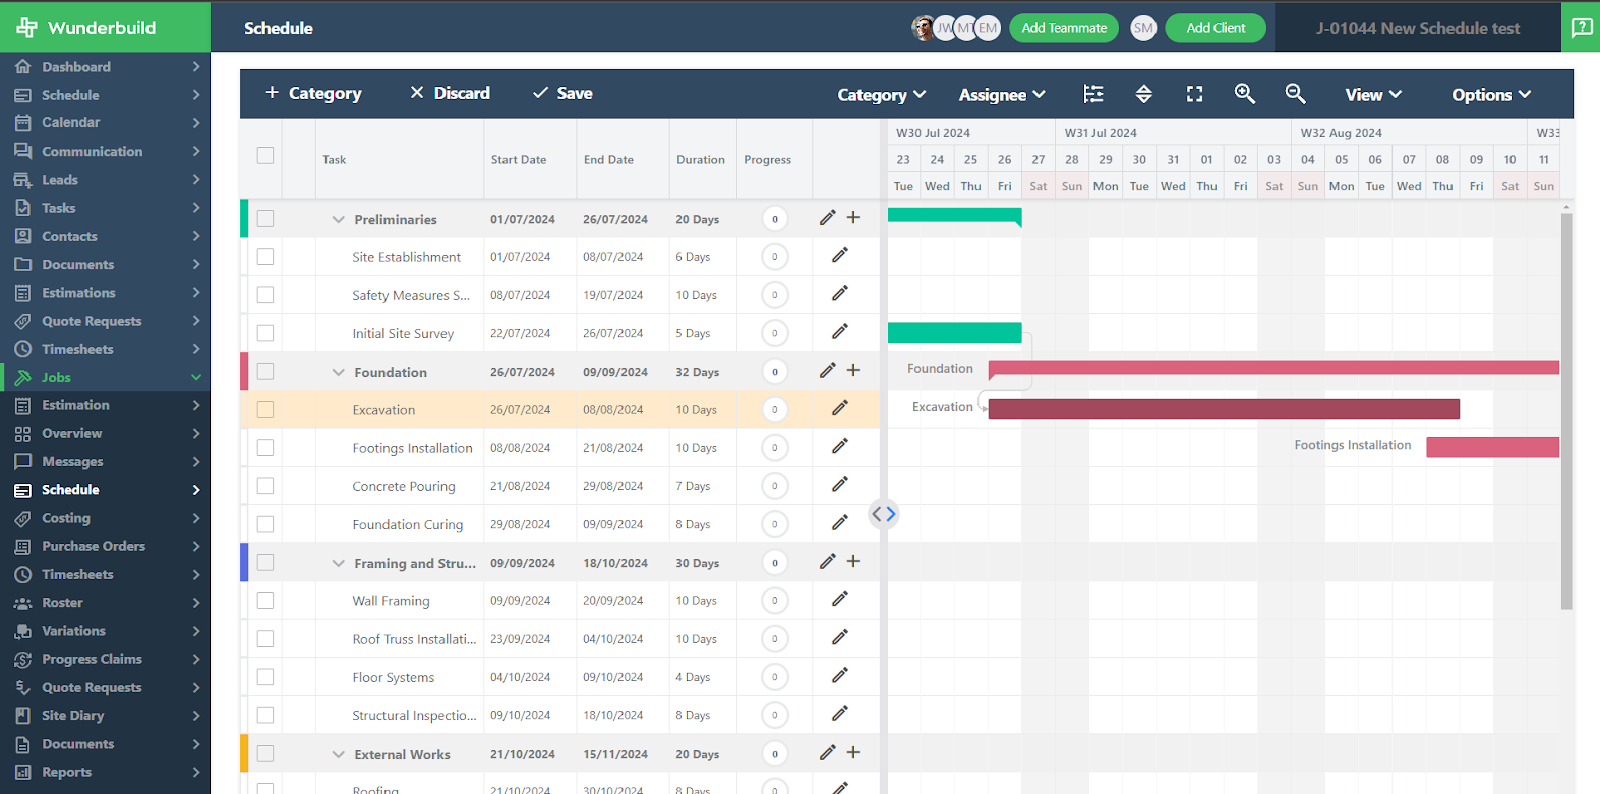
18. The schedule table can be expanded by selecting the arrow option as shown.
Print Gantt Chart
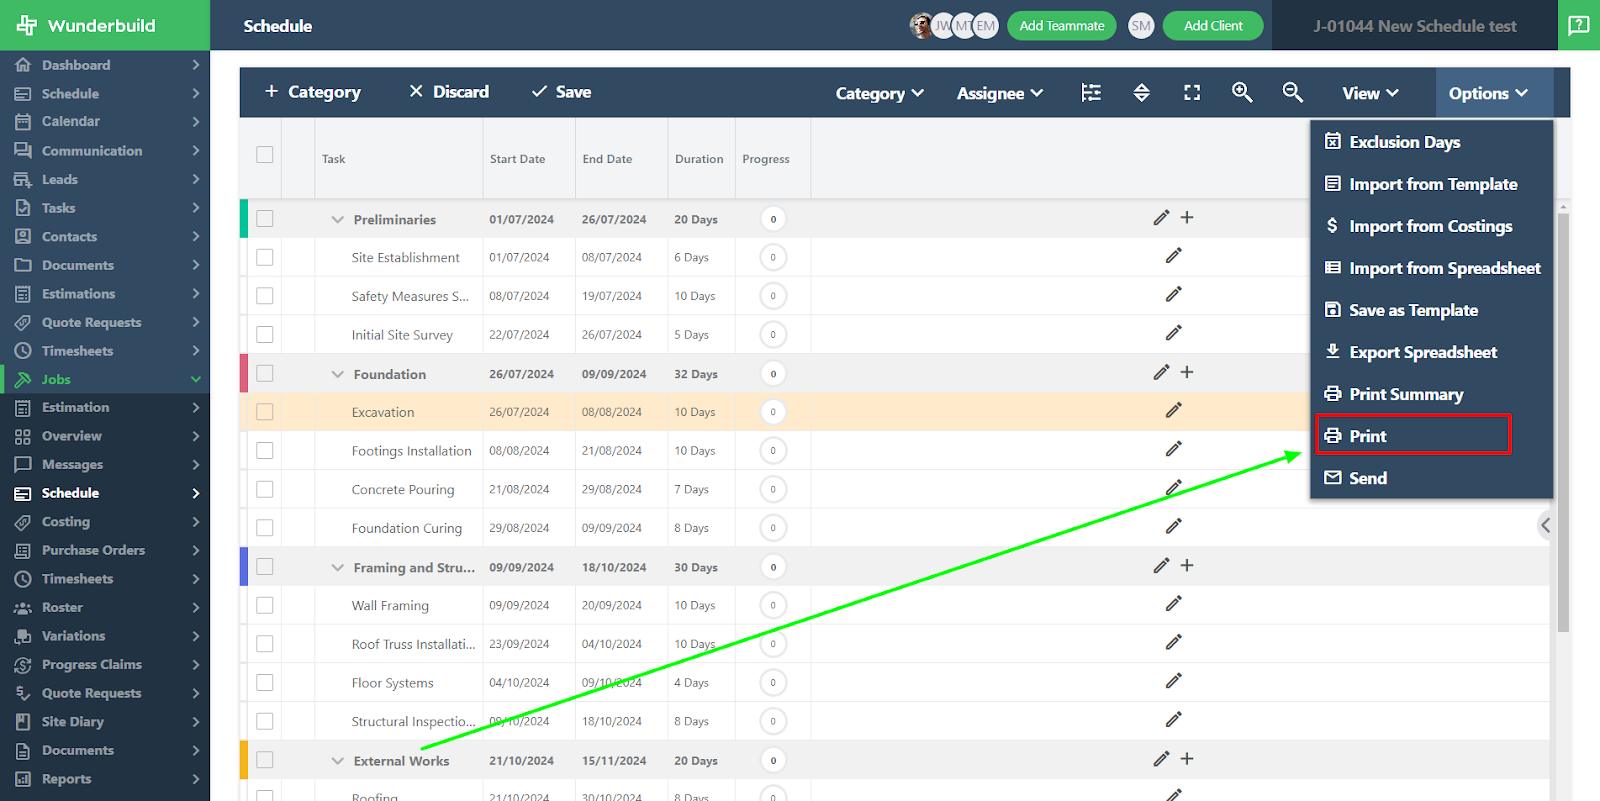
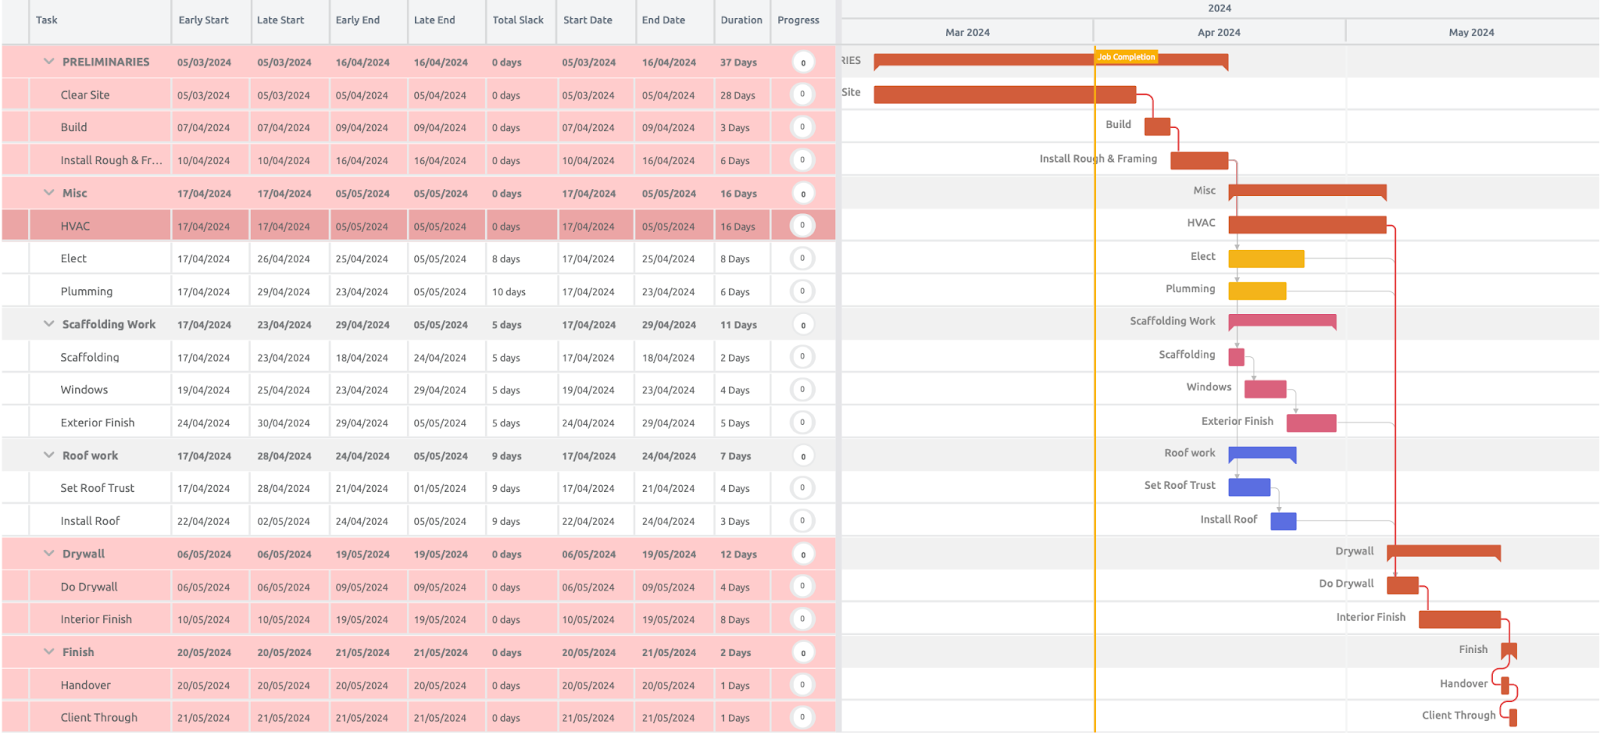
1. You can print your Gantt chart by going to options and selecting the print option.
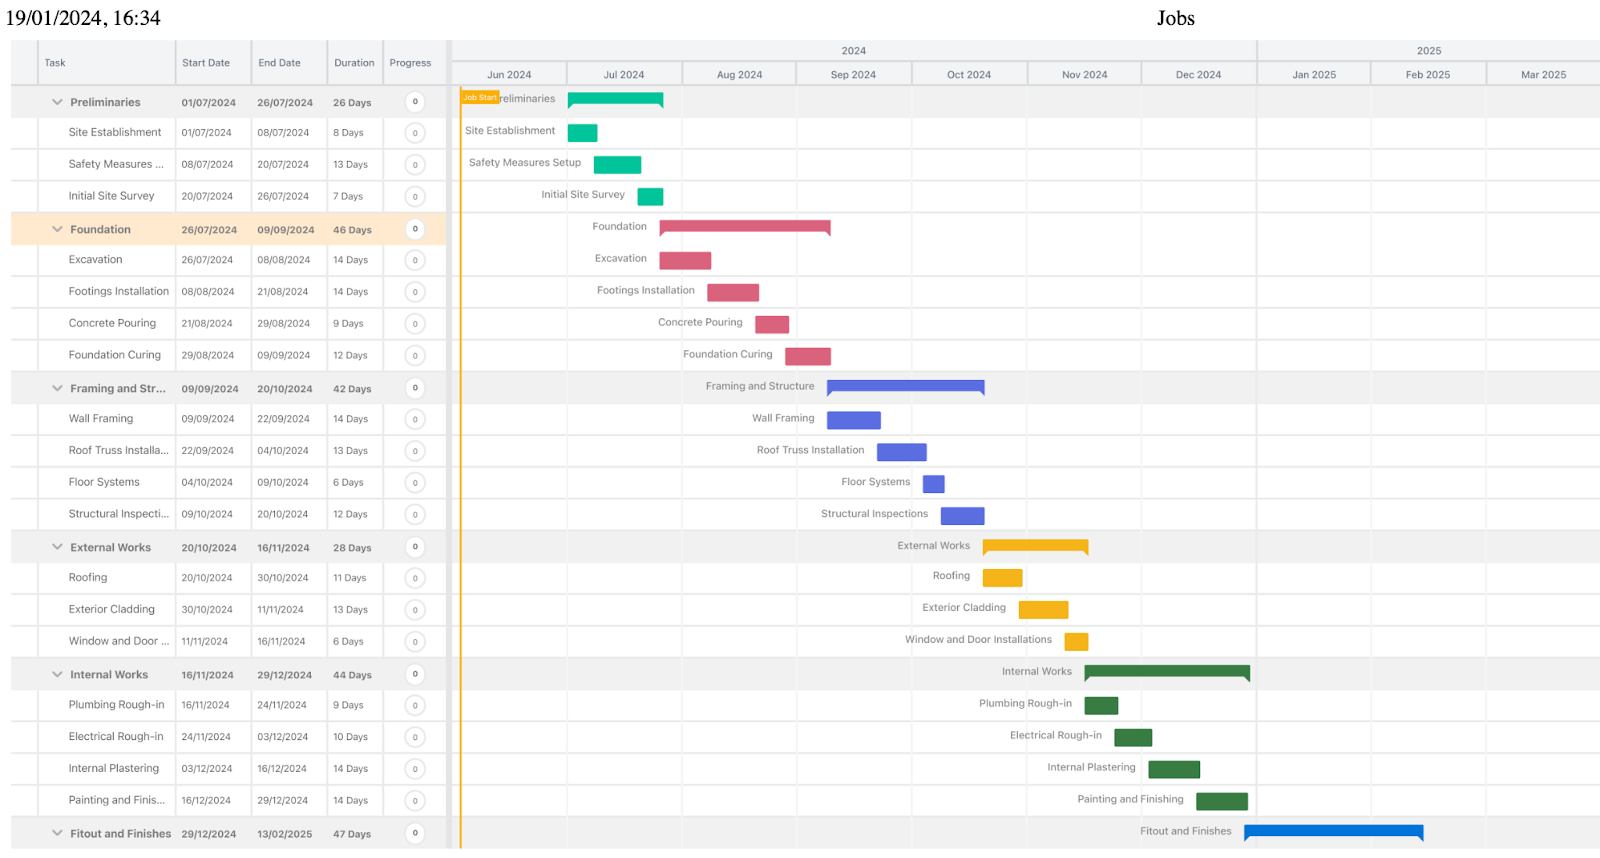
2. You can choose the columns in the schedule you want included, the visible rows or all rows in the schedule, the date range, the pagination, the orientation, the page format and whether or not you want the rows aligned and headers repeated. Below is an example of a printed Gantt chart:
Link Subtasks and Checklists
Callouts
1. You can set callouts for important subtasks by first clicking ‘save’ so you are no longer in edit mode for the schedule and then selecting the subtask button.

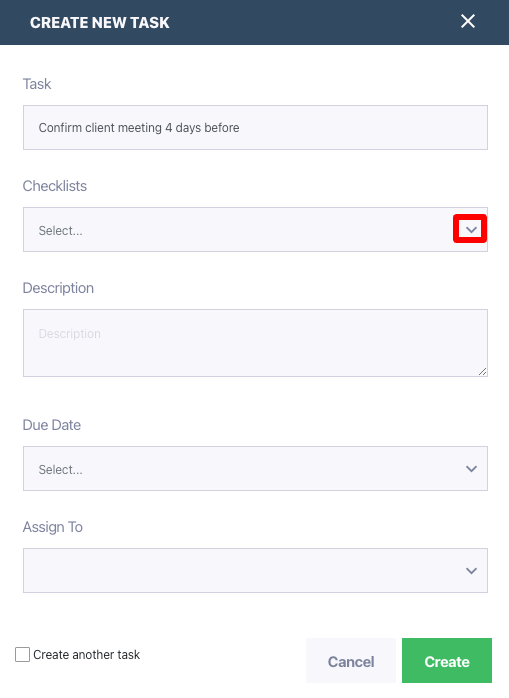
3. The checklists that appear after selecting the dropdown are checklist templates you created with the type of ‘tasks’ To know more about creating checklists in Wunderbuild please see here.
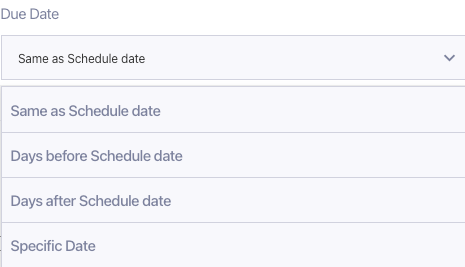
4. You can also set the date for this sub task to be the same date as the task on the schedule it is linked to, the day before, the day after or a specific date.
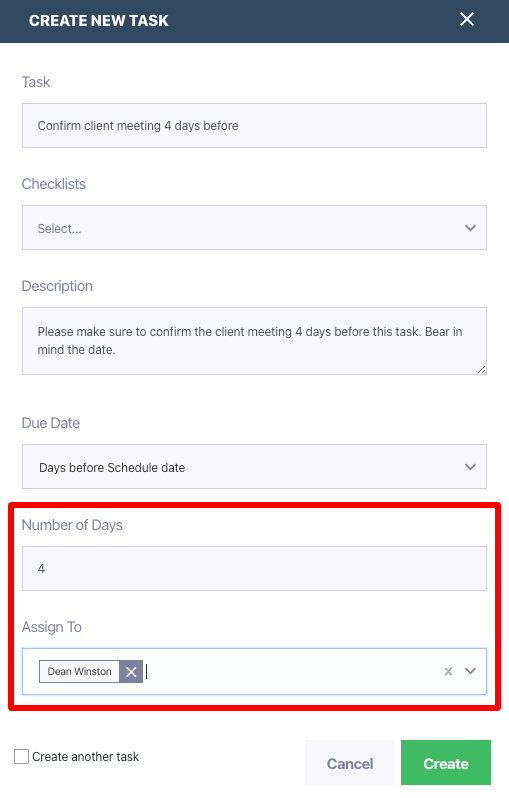
5. If you choose the day before or the day after the scheduled date, an option will appear for you to set the number of days before or after.
6. Lastly, you can choose someone to assign the task to from your team at the very bottom.
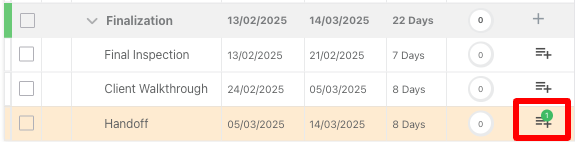
7. Once you have created this subtask, on your schedule you will see a green icon showing you how many sub tasks are linked to a specific task. In this case there is one task linked.
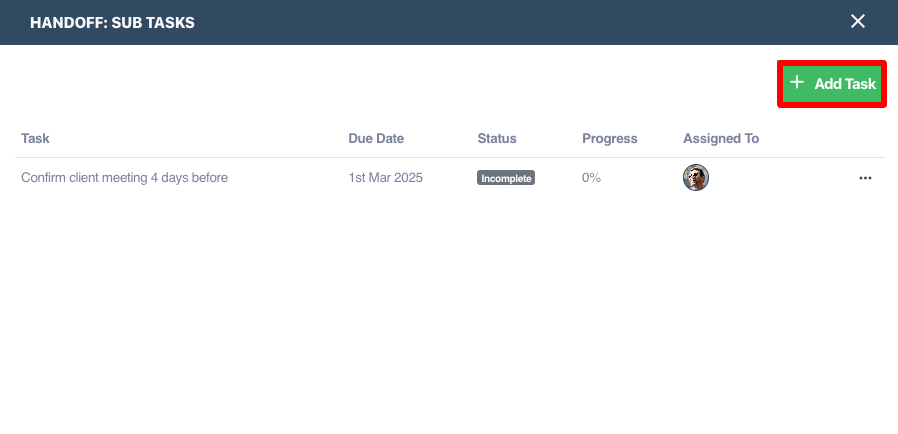
8. Select this icon now to view your subtasks for that task and click the ‘Add Task’ button to add more sub tasks if you wish.
9. If you move your whole schedule down by a period of time, your schedule will automatically calculate and adjust your sub tasks. If you chose 5 days before and linked it to a task and that task has been moved or the whole schedule has been moved it will make sure it is 5 days before that task.
Excluding Public Holidays and Weekends
Create an exclusion calendar
1. Go to settings -> Exclusion Calendars -> click ‘+ Exclusion Calendar’.
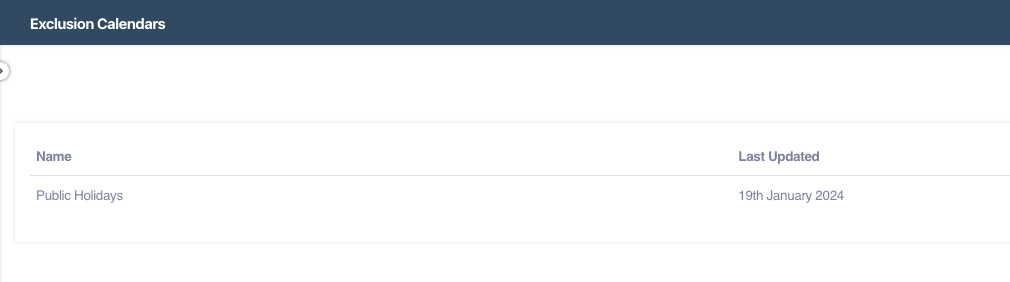
2. Below is an example one created called ‘Public Holidays’ once created click into it to begin adding dates to it.
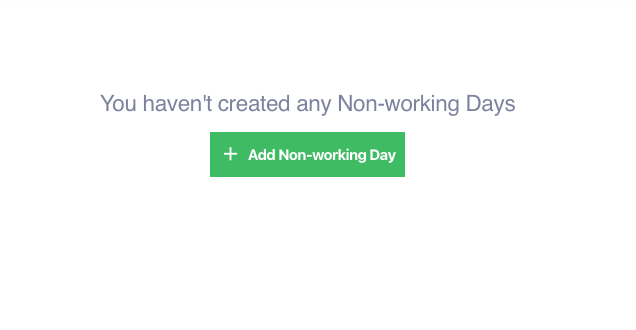
4. To start, click the ‘Add Non Working Day’ button.
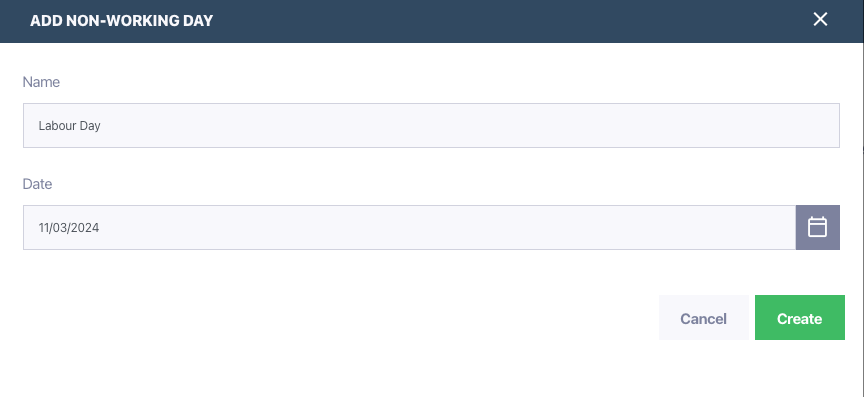
5. Add the name of the non-working day and add a date for it. In this example we have a public holiday exclusion calendar, we will call the non-working day ‘Labour day’.
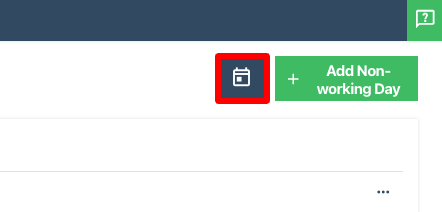
6. Once created it will appear in list format. You can also view it on your exclusion calendar and you can also add more non-working days via the calendar. To do so, click the calendar icon on the top right of your page.
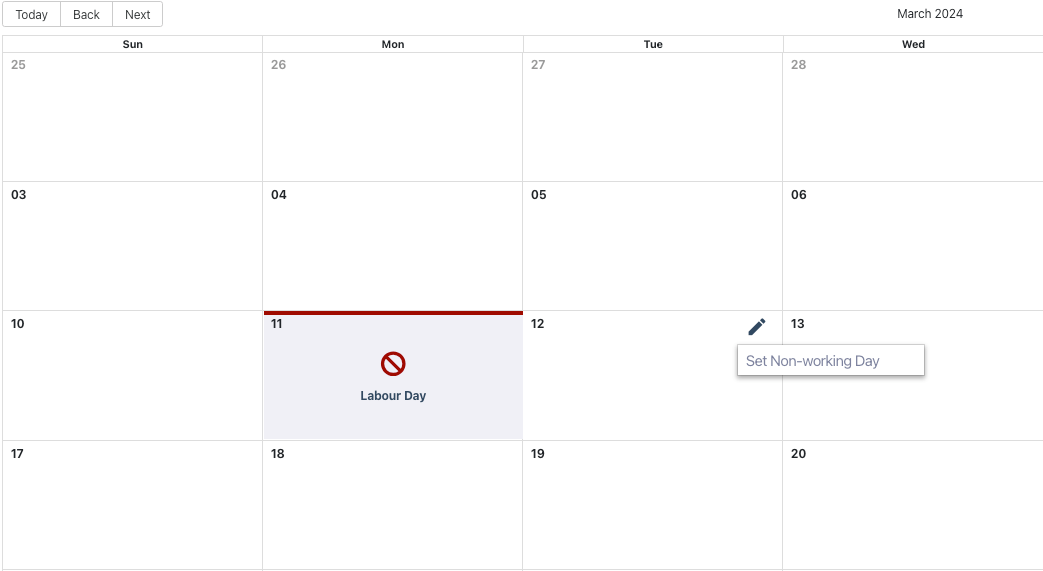
7. Once in the calendar view you can see the public holiday we have added when you navigate to that date. You can also add more exclusion dates by clicking on the edit button that appears when you hover over a specific date and selecting ‘Set non-working day’.
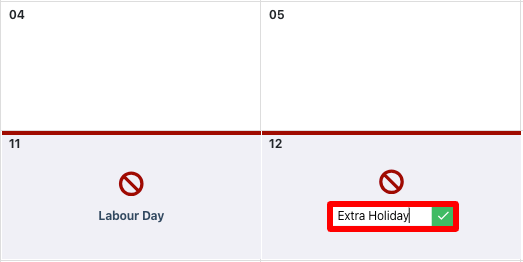
8. Now once you have added another non-working day it will say “non-working day” by default you can click that text to change the name of the non-working day like below.
Add exclusion dates and weekends to your schedule
9. Now you have created exclusion dates you can access them in your schedule and have them blocked out as well as weekends.
10. Go to options in the top right corner and click ‘Exclusion days’.
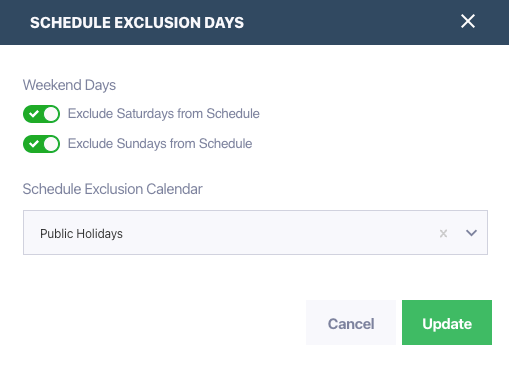
11. You will see the exclusion calendar we just created called ‘Public Holidays’ with our non-working days and public holidays included in it and you can select that.
12. You may also exclude weekends by toggling these buttons in Options:
Critical Path
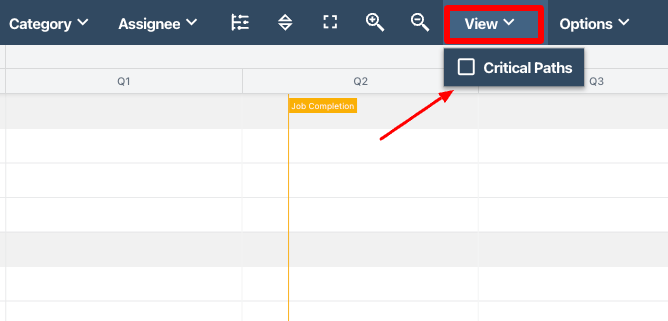
1. You can see the critical path of your schedule which is the sequence of tasks that could delay the project end date when any of the tasks get delayed.
2. To do this click ‘view’ at the top right of your schedule and check the critical path option.
Related Articles
Job Management User Guide
Managing All Existing Jobs 1. Accessing the Jobs Management Tab: Navigate to the Jobs Management tab on the main menu to view the visual board of all the jobs. 2. Accessing and modifying a Job: Click the job title to access that specific job. Click ...Global Schedule Overview User Guide
1. Accessing the Schedules: Navigate to the Schedule tab on the main menu to view the aggregated GANTT chart of all your job schedules. 2. Filtering the schedules: a) Click the dropdown button on “All jobs” to filter the schedule by jobs. Once you ...Wunderbuild App Estimation User Guide
1. Accessing the Estimations : Navigate to Estimations by clicking on the four boxes icon on the bottom right of your screen. Select Estimations. 2. Estimation Overview: Click on the estimation name to navigate to the Estimation overview section. 3. ...Settings User Guide
1. Accessing the Billing Tab: Navigate to the Billing tab by clicking on Billing in the Settings subtab. Subscription Category: You may change your subscription type in Wunderbuild by going to this area. Invoices: You will receive your Wunderbuild ...Site Diary User Guide
1. Accessing the Site Diaries Tab: Navigate to the Site Diaries tab by clicking on Site Diaries in the main menu to see all your Site Diaries in Wunderbuild. 2. Filtering the Site Diary Tab: a) Filter by date. b) Filter by Job. c) Filter by Site ...