Tasks User Guide
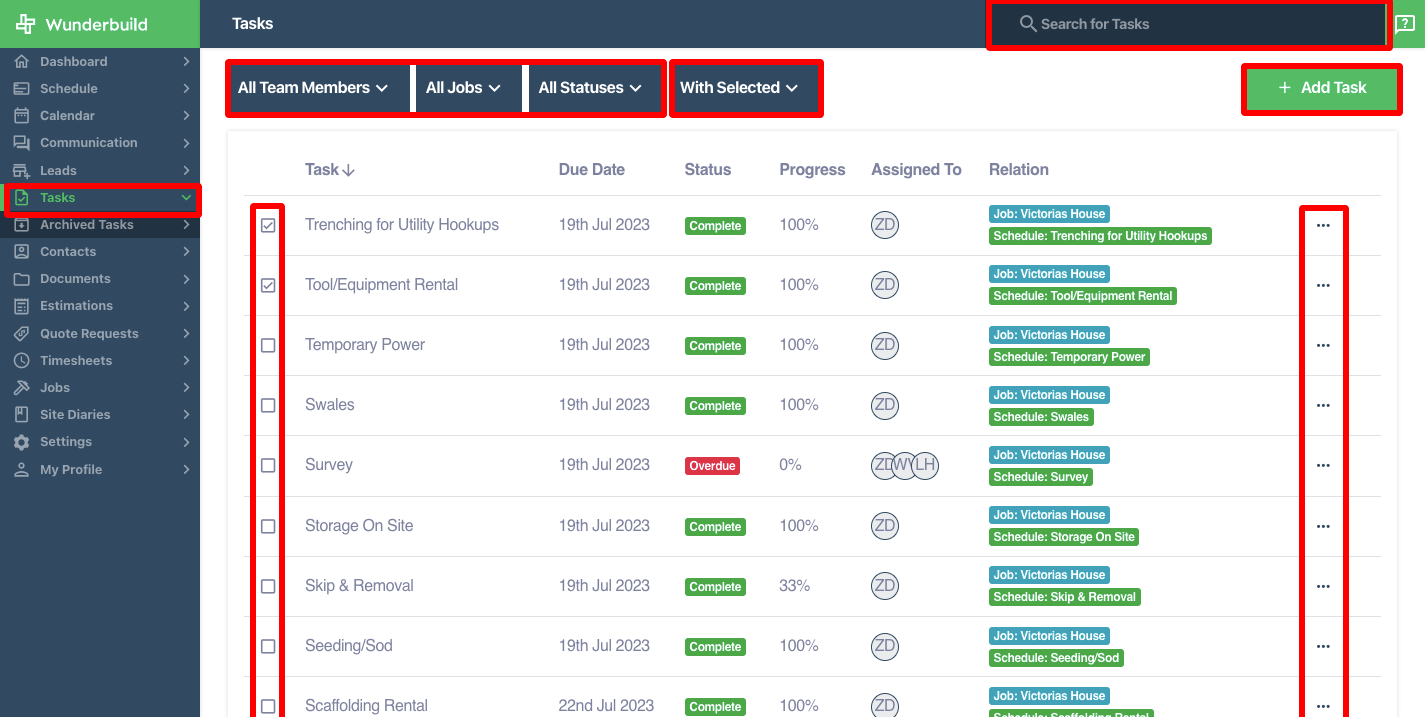
1. Accessing the Tasks: Navigate the Tasks section within the main menu to gain an overview of all
tasks across your various job assignments.
2. Search/Filtering the Tasks:
a) Search a task by using the search bar on the top right corner of the screen.
b) Filter by team members: Click the dropdown menu on “All Team Members” and select a team
member to filter.
c) Filter by jobs: Click the dropdown menu on “All Jobs” and select a job to filter.
d) Filter by status: Click the dropdown menu on “All Status” and select a status to filter.
3. Adding a new task:
- Click on “+ Add a task”
- Fill up necessary fields you may add an assignee or link it to an ongoing job.
- You may tick the “Add another tasks” checkbox to continue on adding new tasks.
- Click “Create”.
4. Edit tasks: Click on the three dots to edit the task.
a) Click “Complete Tasks to complete a task.
b) Click “Archive” to archive a task.
c) Click “Delete Task” to delete a task.
5. Bulk task editing: Mark the task that will need editing, Click the “With Selected” dropdown.
a) Mark as incomplete.
b) Mark as complete.
c) Click “Delete Task” to delete a task.
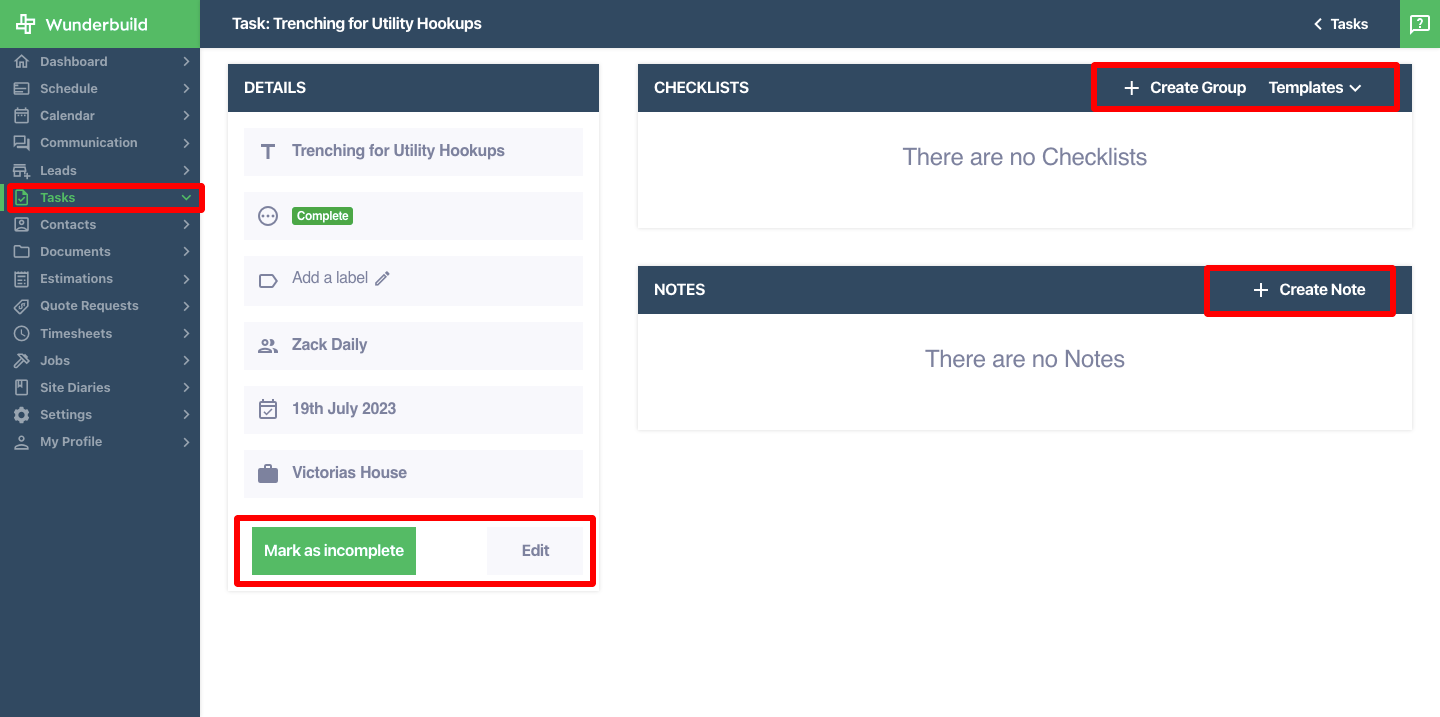
6. Click on the task title to manage each task:
a) Task Details:
- Edit task details by clicking the “Edit button”
- Mark the task as incomplete or complete by clicking the button “Mark as complete/Mark as incomplete”.
b) Create a checklist:
- Create a checklist from scratch by clicking on the “+ Create Group”.
- Import a checklist template by clicking on the “Templates” dropdown.
c) Create a note by clicking on “+Create Note”
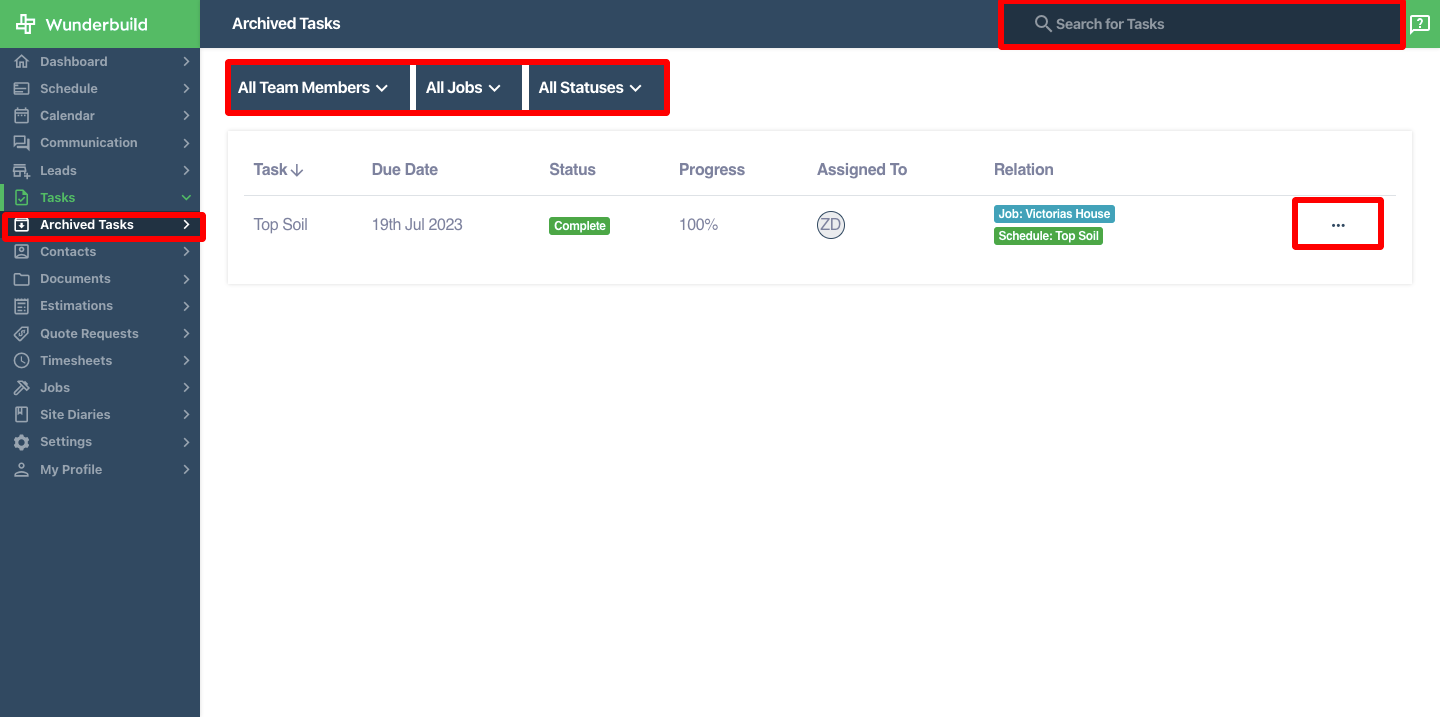
7. Accessing the Archived Tasks: Navigate the Archived Tasks section within the Tasks sub tab.
8. Search/Filtering the Tasks:
a) Search a task by using the search bar on the top right corner of the screen.
b) Filter by team members: Click the dropdown menu on “All Team Members” and select a team
member to filter.
c) Filter by jobs: Click the dropdown menu on “All Jobs” and select a job to filter.
d) Filter by status: Click the dropdown menu on “All Status” and select a status to filter.
9. Modifying an archived task: Click on the three dots beside the archived task.
a) Unarchive: Click to unarchive the task.
b) Delete: Click to delete the task.
Related Articles
App Tasks User Guide
1. Accessing the Task List: Navigate to the Task List tab tab by clicking on the list icon beside the clipboard in the bottom left corner of your screen. 2. Create a new task by clicking on the “Create” button. 3. Filter your tasks by clicking the ...Wunderbuild Job Schedule 2.0 User Guide
Importing The following is a guide on the updated Wunderbuild job schedule. To begin go to your jobs then schedule section inside your job. 1. Click ‘options’ on your schedule to import your schedule into Wunderbuild. Below are instructions on the ...App leads User Guide
1. Accessing the Leads : Navigate to Leads by clicking on the four boxes icon on the bottom right of your screen. Select Leads. 2. Click on create Lead to create a new lead: Fill out necessary information and click on “Create” once done. 3. Click on ...App Jobs User Guide
1. Accessing the Job List: Navigate to the Job List tab tab by clicking on the clipboard icon in the bottom left corner. 2. Navigating the Job List section: Use the search bar to search your desired job in Wunderbuild. Click on the job name to access ...Job Management User Guide
Managing All Existing Jobs 1. Accessing the Jobs Management Tab: Navigate to the Jobs Management tab on the main menu to view the visual board of all the jobs. 2. Accessing and modifying a Job: Click the job title to access that specific job. Click ...